#rethinkdb
RethinkDB is a distributed document-store database that is focused on easy of administration and clustering. RethinkDB also features functionality such as map-reduce, sharding, multi-datacenter functionality, and distributed queries. Though the database is relatively new, it has been funded and is moving quickly to add new features and a Long Term Support release.
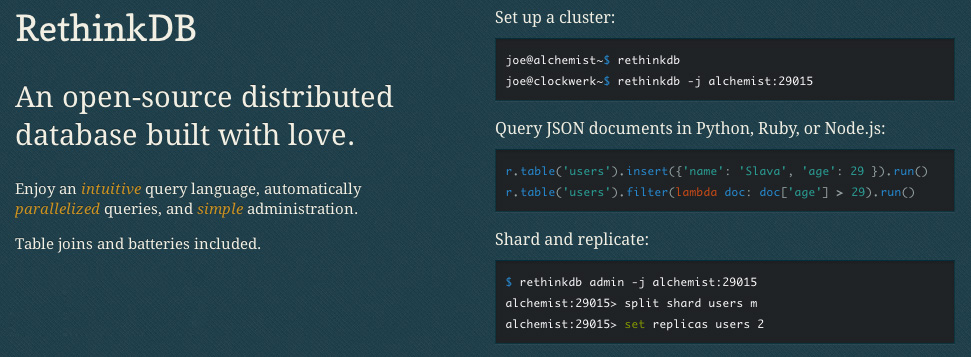
One major issue still remains with RethinkDB, however-- it's relatively difficult to secure properly unless you have security group or virtual network functionality from your hosting provider (a la Amazon Web Services Virtual Private Cloud, security groups, etc.). For example, RethinkDB's web administration interface is completely unsecured when exposed to the public Internet, and the clustering port does not have any authentication mechanisms. Essentially, this means that if you have an exposed installation of RethinkDB, anyone can join your database cluster and run arbitrary queries.
![]()
DigitalOcean, a great startup VPS provider, is a cheap means of trying out RethinkDB for yourself. The one issue is, they currently do not provide any easy way of securing clusters of RethinkDB instances. Unlike Amazon's security groups, which allow you to restrict traffic between specific instances, every DigitalOcean VPS can talk to each other over the private network1. Essentially, this would allow any DigitalOcean VPS in the data center to attach itself to your RethinkDB cluster, which is less than ideal.
Because of this, DigitalOcean is not a great host to run a cluster on if you're looking to get up and running quickly. There are ways around this, such as running a VPN (especially a mesh VPN like tinc) or manually adding each RethinkDB's IP address to your iptables rules, but this is a much more complicated setup than using another host that has proper security groups.
However, this doesn't mean that DigitalOcean is a bad host for your RethinkDB database-- especially if you're looking to try out the database or if you're just running a single node (which is fine for many different applications). In this tutorial, we'll go over how to properly setup a RethinkDB node and configure iptables to secure access to the database and web administration interface on DigitalOcean specifically, however this tutorial applies to any VPS or Dedicated Server provider.
Launching a Droplet
The first step you want to take is to sign up for DigitalOcean. If you sign up from this link, you will receive $10 in credit for free. This is enough to run a 512 MB droplet for two months, or a 1 GB RAM droplet for a single month2.
After registering, log into your account and create a new droplet3 on the dashboard. Enter a hostname, choose an instance size4, select the region closest to you5 for the lowest latency, and choose an operating system. For now, "Ubuntu 13.10 x64" or "Ubuntu 13.04 x64" are good choices unless you have another preference. If you wish to use an SSH key for authentication (which is highly recommended), select which key you'd like preinstalled on your Droplet. After you've selected all of the options you'd like to use, click the large "Create Droplet" button at the bottom of the screen.
Installing RethinkDB
Once your instance is launched, you're taken to a screen containing your server's IP address. Go ahead and SSH into it with either the root password emailed to you or with your SSH key if you've selected that option. You should be taken to the console for your freshly launched Ubuntu instance.
To actually install RethinkDB, you'll need to add the RethinkDB Personal Package Archive (PPA) with the command sudo add-apt-repository ppa:rethinkdb/ppa6.
Next, update your apt sources with sudo apt-get update, and then install the RethinkDB package with sudo apt-get install rethinkdb.
Configuring RethinkDB
As of now, you could run the command rethinkdb, and RethinkDB would start up and create a data file in your current directory. The problem is, RethinkDB does not startup on boot by default and is not configured properly for long term use.
To configure RethinkDB, we'll use a configuration file that tells RethinkDB how to run the database. Go ahead and copy the sample configuration into the correct directory, and then edit it:
sudo cp /etc/rethinkdb/default.conf.sample /etc/rethinkdb/instances.d/instance1.conf
sudo nano /etc/rethinkdb/instances.d/instance1.conf
Note that there are two commands above-- if there is a line break inside of the first command, ensure you copy and paste (or type out) the whole thing. This will open up the "nano" editor, though you can substitute this with any other editor you have installed on your VPS.
RethinkDB Configuration Options
The sample configuration file, as of RethinkDB v0.11.3, is included below for reference:
#
# RethinkDB instance configuration sample
#
# - Give this file the extension .conf and put it in /etc/rethinkdb/instances.d in order to enable it.
# - See http://www.rethinkdb.com/docs/guides/startup/ for the complete documentation
# - Uncomment an option to change its value.
#
###############################
RethinkDB configuration
###############################
Process options
User and group used to run rethinkdb
Command line default: do not change user or group
Init script default: rethinkdb user and group
runuser=rethinkdb
rungroup=rethinkdb
Stash the pid in this file when the process is running
Command line default: none
Init script default: /var/run/rethinkdb//pid_file (where  is the name of this config file without the extension)
pid-file=/var/run/rethinkdb/rethinkdb.pid
File path options
Directory to store data and metadata
Command line default: ./rethinkdb_data
Init script default: /var/lib/rethinkdb// (where  is the name of this file without the extension)
directory=/var/lib/rethinkdb/default
Log file options
Default: /log_file
log-file=/var/log/rethinkdb
Network options
Address of local interfaces to listen on when accepting connections
May be 'all' or an IP address, loopback addresses are enabled by default
Default: all local addresses
bind=127.0.0.1
The port for rethinkdb protocol for client drivers
Default: 28015 + port-offset
driver-port=28015
The port for receiving connections from other nodes
Default: 29015 + port-offset
cluster-port=29015
The host:port of a node that rethinkdb will connect to
This option can be specified multiple times.
Default: none
join=example.com:29015
All ports used locally will have this value added
Default: 0
port-offset=0
Web options
Port for the http admin console
Default: 8080 + port-offset
http-port=8080
CPU options
The number of cores to use
Default: total number of cores of the CPU
cores=2
bind
There are a couple of important entries we need to look at. First of all, is the bind address. By default, RethinkDB will only bind on the local IP address 127.0.0.1. This means that nothing outside of the machine the RethinkDB server is running on can access the data, join the cluster, or see the web admin UI. This is useful for testing, but in a production environment where the database is running on a different physical server than the application code, we'll need to change this.
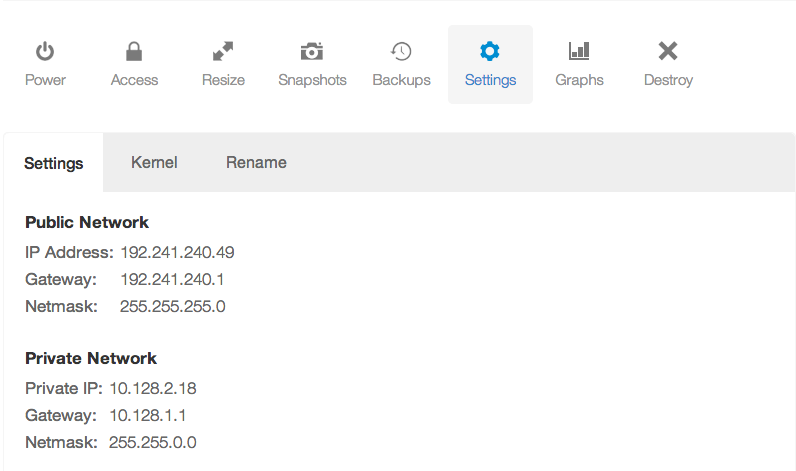
If you've launched an instance in a data center than supports private networking, you can change the bind option to your private IP address7 to start with. For example, if my private IP address is 10.128.2.18, you could use that value for the bind option. Also, make sure you remove the leading hash "#" symbol. This will uncomment the line and make the configuration active. If you want your database to be accessible to the public Internet, you may use your public IP address. Note that there are security ramifications of exposing your RethinkDB instance to the Internet, though we'll address them a little later.
If you wish to bind to all IP addresses-- including public IP addresses--you can use 0.0.0.0.
driver-port, cluster-port
The driver and cluster port options generally should not be modified unless you have a reason to do so. Modifying the ports just so that someone may not "guess" which ports you're using for the RethinkDB instance is not secure-- always assume that someone will find which ports you've configured, and secure your machine appropriately.
http-port
This option configures which port the HTTP administration UI will be accessible on. As with the driver-port and cluster-port, you can change this if the port is already in use by another service.
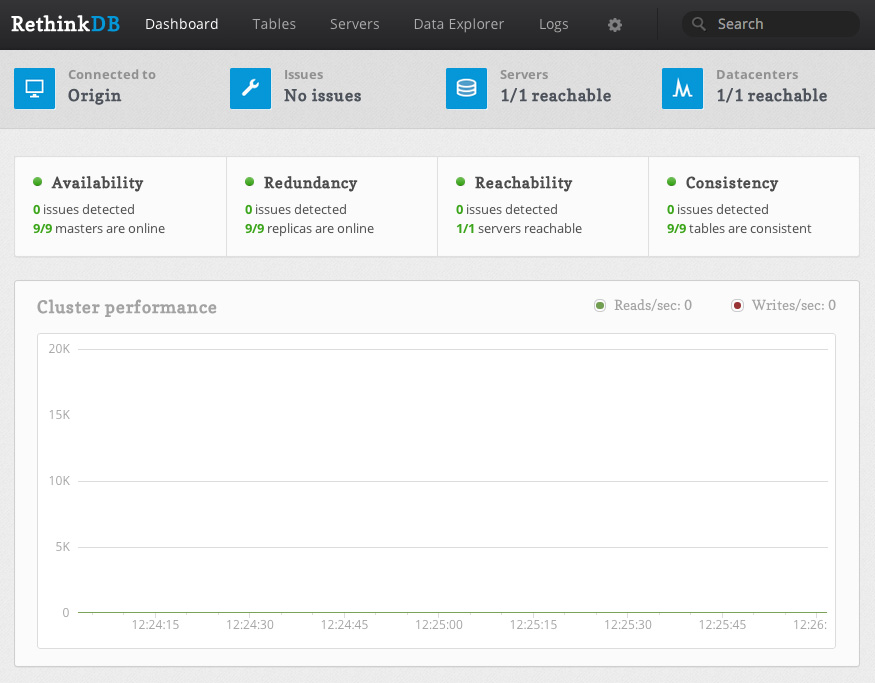
However, note that the admin UI is not secured in any way. Anyone with access to the admin panel can edit and delete machines from your cluster, and create, edit, and delete database tables and records. However, the admin UI will only be available on the bind address you've configured, so if you've left your bind address as 127.0.0.1, you will only be able to access the admin UI directly from the machine running RethinkDB.
join
The join address will not be used in this lesson, though this option configures which hostname or IP address and port your RethinkDB instance will attempt to join to form a cluster.
Once you've configured all of the options appropriately, you can save the configuration file and start the RethinkDB service:
sudo /etc/init.d/rethinkdb restart
Securing RethinkDB
Now you have RethinkDB running on your server, but it is completely unsecured if your bind address is anything but 127.0.0.1 or another non-accessible IP address. We need to do a couple of things:
- Restrict access to the cluster port so that no other machines can connect to the cluster
- Restrict access to the HTTP admin web UI so that malicious parties cannot access it
- Secure the client driver port so that RethinkDB requires an authentication key, and optionally restrict the port to only allow a specific set of IP addresses to connect
Using iptables to Deny Access to Ports
One method of restricting access to a specific port is through the use of iptables. To block traffic to a specific port, we can use the command:
iptables -A INPUT -p tcp --destination-port $PORT -j DROP
Simply change $PORT to the specific port you'd like to drop traffic for. For example to deny access to the cluster port (since we're not building a cluster of RethinkDB instances), we can use the command:
iptables -A INPUT -p tcp --destination-port 29015 -j DROP
This is assuming that you have not changed the default cluster communication port of 29015. Simply modify the above command to read the same as the "cluster-port" configuration entry if necessary.
Now, we'd also like to deny all traffic to the web administration interface that's located on port 8080. We can do this in a similar manner:
iptables -A INPUT -p tcp --destination-port 8080 -j DROP
However, this command denies access to the web administration UI for everyone-- including yourself. There are three primary ways we can allow you to access the web UI, from most secure to least secure--
- Use an SSH tunnel to access the interface
- Use a reverse proxy to add a username and password prompt to access the interface
- Drop traffic on port 8080 for all IP addresses except your own
Accessing the web administration UI through a SSH tunnel
To access the web administration UI through an SSH tunnel, you can use the following set of commands.
First, we must make the administration UI accessible on localhost. Because we dropped all traffic to the port 8080, we want to ensure that traffic from the local machine is allowed to port 8080.
sudo iptables -I INPUT -s 127.0.0.1 -p tcp --dport 8080 -j ACCEPT
The above command does one thing-- it inserts a rule, before the DROP everything rule, to always accept traffic to port 8080 from the source 127.0.0.1-- the local machine. This will allow us to tunnel into the machine and access the web interface.
Next, we need to actually setup the tunnel on your local machine. This should not be typed into your VPS console, but in a separate terminal window on your laptop or desktop.
ssh -L $LOCALPORT:localhost:$HTTPPORT $IPADDRESS
Replace the $LOCALPORT variable with a free port on your local machine, $HTTPPORT with the port of the administration interface, and $IPADDRESS with your VPS IP address. Additionally, if you SSH into your VPS with another username (e.g. root), you may append "$USERNAME@" before the IP address, replacing $USERNAME with the username you use to authenticate.
Once you've run the above commands, then you should be able to visit localhost:$LOCALPORT in your local web browser and see the RethinkDB web interface.
For a complete example example, the following exposes the RethinkDB administration interface on localhost:8081:
ssh -L 8081:localhost:8080 [email protected]
Using a Reverse Proxy
Because using a reverse proxy involves setting up Apache, Nginx, or some other software on your VPS, it is better to refer you to the official RethinkDB documentation on the subject. The setup steps aren't long, but out of the scope of this tutorial.
If you setup a reverse proxy, make sure you still allow local traffic to the web administration port.
sudo iptables -I INPUT -s 127.0.0.1 -p tcp --dport 8080 -j ACCEPT
Allowing Access for Your IP Address
One final method we'll go over for allowing access to the web UI from yourself is through whitelisting your IP address. This is done in a similar way to allowing local access to port 8080, except with your own IP address instead of 127.0.0.1. After finding your external IP address, you can run the following command on the VPS, replacing $IPADDRESS with the IP address:
sudo iptables -I INPUT -s $IPADDRESS -p tcp --dport 8080 -j ACCEPT
However, I would like to reiterate the insecurity of this method-- anyone with your external IP address, including those on your WiFi or home network, will have unrestricted access to your database.
Allowing Access for Client Drivers
Now that you've allowed yourself access to the web administration UI, you also need to ensure that the client drivers and your application can access the client port properly, and that the access is secured with an authentication key.
Setting an Authentication Key
First and foremost, you should set an authentication key for your database. This will require all client driver connections to present this key to your RethinkDB instance to authenticate, and allows an additional level of security.
On your VPS, you'll need to run two commands-- one to allow for local connections to the cluster port in order to run the administration command line interface, and the other to set the authentication key:
sudo iptables -I INPUT -s 127.0.0.1 -p tcp --dport 29015 -j ACCEPT
Next, we'll run the RethinkDB command line tool:
rethinkdb admin --join 127.0.0.1:29105
This will bring you into the command line administration interface for your RethinkDB instance. You can run a single command, set auth $AUTHKEY, replacing $AUTHKEY with your authentication key.
After you're done, you can type exit to leave the administration interface, or you can take a look at the RethinkDB documentation to see other commands you can run.
If you recall, at this point, the client port (by default, 28105) is still accessible from the public Internet or on whatever interfaces you've bound RethinkDB to. You can increase security to your database by blocking access (or selectively allowing access) to the client port using iptables and commands similar to those listed earlier in the tutorial.
Further Reading
Now that you've setup RethinkDB and secured it using iptables, you can access the administration UI and connect to your instance using a client driver with an authentication key. Though we've taken basic security measures to run RethinkDB on DigitalOcean, it's still recommended to take additional precautions. For example, you may wish to either use a mesh VPN such as tinc to encrypt the database traffic between your clustered instances, if you choose to expand your cluster in the future.
It's also worth reading over the fantastic RethinkDB official documentation for additional instruction on configuring your instance or cluster, or on how to use the administration interface or the ReQL query language8.
- Private networking is only supported in specific data centers at this time, including the NYC 2, AMS 2, and Singapore data centers. ↩
- DigitalOcean's pricing page has a switch that lets you see the hourly or monthly price of their servers. The monthly price is the maximum you can pay per month for that specific server, even if the number of hours in a month times the hourly price is more. For example, a 512 MB VPS is $0.007 per hour or $5 a month. The maximum days in a single month is 31, times 24 hours, times $0.007 per hour equals about $5.21. However, because the monthly price of the VPS is $5, you only pay that amount. ↩
- DigitalOcean calls their VPS servers "Droplets". This is similar to Amazon's "Instance" terminology. ↩
- I highly recommend at least using a 1 GB Droplet if you're planning on actually using RethinkDB or trying it out with large amounts of data. If you just want to check out RethinkDB and see how it works, you can start out with a 512 MB Droplet just fine. ↩
- Remember, you must select a region with private networking (such as NYC 2, AMS 2, or Singapore) if you wish to create a cluster and use the private IP address for cluster communication. This way, you're not billed for cluster traffic. However for a single node, you may choose any data center you'd like. ↩
-
Getting an error saying you do not have the command "add-apt-repository"? If you're running Ubuntu 12.10 or newer, then install it with
sudo apt-get install software-properties-common. Ubuntu versions older than 12.10 should use the commandsudo apt-get install python-software-properties. ↩ -
You can find your private IP address (or public IP address) in your DigitalOcean control panel, under the Droplet you're running, and in the settings tab:
 ↩
↩
- I realize this is redundant. ↩