#vpn
I recently wrote about using virtual machines to host your own GitLab instance. In that post, I suggested setting a static IP address for your virtual machines so they are accessible through a fixed address. Unfortunately, issues with networking and allowing the VMs to access the outside internet forced me to look for an alternate solution. Recently, I discovered a better way of accessing these VMs that also gives them internet access and a static IP address-- through a VPN using Hamachi.
Using Hamachi to Access Your VM
Personally, I used Hamachi over other VPN software. They have various binary distributions for RPM and DEB based flavors of Linux, as well as compiled ARM distributions (in case you want to try and run GitLab on your Raspberry Pi or something, which isn't a bad idea)
Once you've registered a free account (which allows you to have up to 5 clients in a network, or 32 for $29 /yr), create a new network.
A mesh network works the best here for minimal configuration. If you choose to use a hub-and-spoke network, you'll just have to make all of your servers the "hubs" and your client machines "spokes" for access between the machines to work properly.
Create the network without a password and require approval from the web portal. You can change this if you want and require a password, but it isn't necessary as approval is required by yourself in the web portal.
You can install the Hamachi client on your Mac, Windows, or Linux computer. This will allow your development machine to access the servers, which we'll setup in a minute.
Setting up Hamachi on the Servers
I have two servers in virtual machines-- a GitLab instance and a Jenkins CI server for building my projects. The process for setting up Hamachi on either of these servers is the same.
First, go to the experimental build page for LogMein Hamachi. Half way down the page you should see the section titled "LogMeIn Hamachi for Linux (Beta)." Obviously, this is a command line client for adding your servers to Hamachi networks.
Make a note of the URL for the proper file. If you followed my other guide and used Ubuntu 12.04 LTS 64 bit, you will want the "logmein-hamachi-2.1.0.86-1_amd64.deb" file.
Download and install the DEB using the following, replacing the URL with the appropriate version of Hamachi, or use the appropriate commands for your RPM based Linux distro.
cd /tmp
curl https://secure.logmein.com/labs/logmein-hamachi_2.1.0.86-1_amd64.deb -o hamachi.deb
sudo dpkg -i hamachi.deb
sudo apt-get install -f
Essentially, the commands above download the DEB to your /tmp directory and install it using dpkg. We also use the apt-get install -f to install all the dependencies of Hamachi.
Once this is done, you can use Hamachi through sudo hamachi. Typing this command will show you the current status of Hamachi, including the LogMeIn account attached, client ID, and other information.
To attach the client to your LogMeIn account, perform the following commands in your terminal.
sudo hamachi login
sudo hamachi attach [YOUR LOGMEIN EMAIL ADDRESS]
This will attach the client to your LogMeIn account after you approve on the web client. To approve the attachment, go to the LogMeIn website on your Mac or PC (not the Linux server). At the top of your client list should be a link that indicates a machine is awaiting your approval to be attached to your account. Approve the attachment and add the computer to your network that you created earlier.
Once this is done, on your Mac or PC, navigate to the IP address listed in the Hamachi control panel for your GitLab instance. You should see the login screen if everything went smoothly.
Reconfiguring GitLab for the New IP Address
Because the GitLab instance's IP address is now 25.x.x.x instead of the previous 192.x.x.x or 10.x.x.x, you'll need to edit the configuration file to reflect this.
SSH into your GitLab server and perform the following commands.
sudo su gitlab
cd ~/gitlab/config/
vi gitlab.yml
If you don't want to use vi, you can use nano or whatever editor you wish. In the gitlab.yml file, find the host: and ssh_host: fields. Change the values for both of these to the IP address of the GitLab instance.
Save the file (:wq! for vi) and reboot the server, and you should be able to use GitLab as before. As a bonus, this will even work between any new machines you add to the VPN.
I recently purchased a diskless ReadyNAS 104 device from Netgear and filled it with a trio of WD Red 3 TB drives for my personal file storage. In this configuration, the NAS has a capacity of approximately 6 TB (one of the disks is used for parity), and houses backups of my files, photos, and home videos.
But, considering the device is attached to my apartment's WiFi network, it's not so useful outside of the premises. Netgear provides a client application called "ReadyNAS Remote", which provides remote access to the NAS device presumably by relaying your traffic through one of their servers. However, this can be slow and potentially a security concern. As an alternative, I compiled ZeroTier One, a mesh VPN, to connect to my NAS remotely.
ZeroTier One is an open source mesh VPN software similar to N2N or Tinc. However, unlike N2N or Tinc, ZeroTier provides easy to use client applications to configure the network and handles both authentication and network management for you. This is similar to how LogMeIn Hamachi behaves, which also provides a web interface for creating networks and approving clients.
Registering for ZeroTier
ZeroTier's client software is open source, though they do provide a premium service for free that allows you to connect more than 10 clients to a private network. However, if you'd like to run a private network with more than 10 clients for free, you can still do so by running the software on your own servers1.
Once you register for ZeroTier on their website, choose a name for your network and register it. After you've registered the network, you'll see some configuration options:
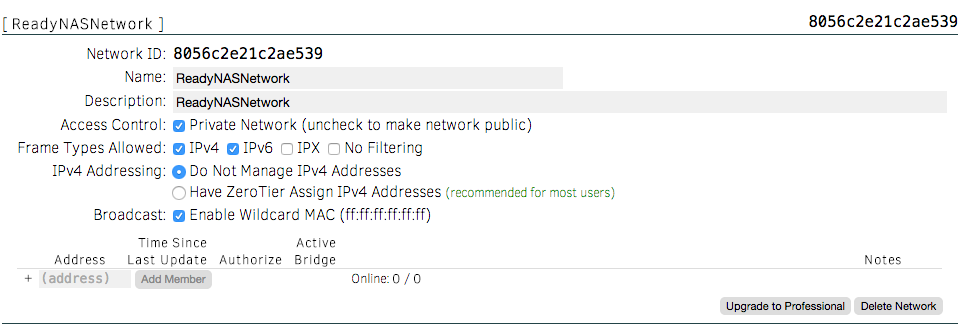
Ensure that the "Private Network" box is checked (it is by default), and go ahead and select "Have ZeroTier Assign IPv4 Addresses". This will allow ZeroTier to essentially act like a DHCP server for your VPN network. Any netblock can be used-- it's all based on your preference and whether any networks you use already use the netblock.
Installing the ZeroTier Client
The VPN clients for Mac and Windows are fairly straightforward to install. You may go ahead and install the clients onto the machines you wish to access the NAS from. Once the clients are installed, simply enter the network ID (as seen in the administration panel) into the text box in the bottom right hand corner of the ZeroTier window and click the plus.
You will see an "Access Denied" message once you've added the network because you must authorize the client from the web admin page. Go ahead and go so by checking the box next to the new client listed in your admin panel under the network you created. You may also want to give the client a descriptive name so you may identify it later.
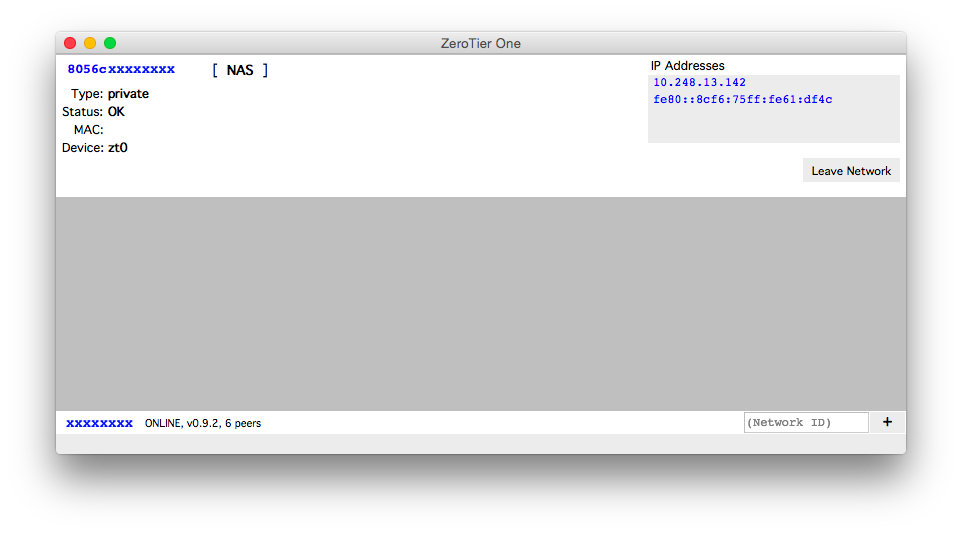
The client doesn't have much to configure-- most of the configuration, such as static IP address assignments, are done from the ZeroTier administration interface.
Compiling ZeroTier One for ReadyNAS
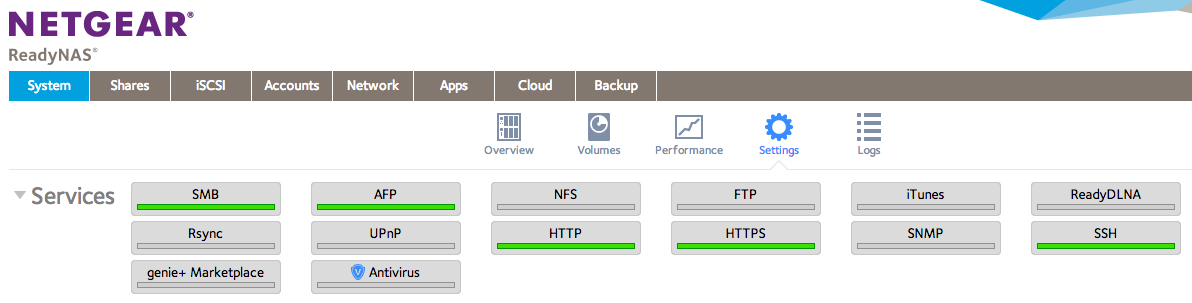
The ReadyNAS 102 and 104 are ARM devices running a lightweight version of Debian Linux. However, currently ZeroTier doesn't provide an ARM download for the client, so we must compile it ourselves. First, you must enable the SSH service from your ReadyNAS administration console. This can be found under "System" > "Settings".
Once SSH is enabled, you can login to your NAS as the "root" user with the same password that's set for the "admin" user on the front end. We'll need to add some software to compile ZeroTier-- namely, Git and the build tools. This can be done with a couple commands:
apt-get update
apt-get install git build-essential
Once this is completed, we'll need to get the source code for the ZeroTier client.
cd /tmp
git clone https://github.com/zerotier/ZeroTierOne.git zerotier
The main branch of the ZeroTier source code repository is a little old and doesn't have some fixes required for ARM devices, and we must use the adamierymenko-dev branch. The below commands point to the specific commit I compiled for my ReadyNAS:
cd zerotier
git checkout d37c3ad30f23f4c2dda23dfac6852dddde6af18d
After the branch is checked out, you can run make in the ZeroTier One directory to compile the binaries. This will take a couple minutes because the ARM processor on the ReadyNAS is quite slow compared to a typical x86 desktop.
Once the software is compiled, you'll have a couple binaries in the ZeroTier directory: zerotier-cli, zerotier-idtool, and zerotier-one. The two most important tools are zerotier-cli and zerotier-one. The latter is the service that runs to connect to the ZeroTier network and your other clients, while the former controls the service and commands it to join and leave networks.
You probably want to move the binaries to another location that isn't the temporary directory:
mkdir -p /usr/local/zerotier
mv zerotier-* /usr/local/zerotier/
After this is done, you can launch the ZeroTier service in the background:
/usr/local/zerotier/zerotier-one &
We also want to run the ZeroTier service at boot and stop it before shutdown. This can be done by creating a new file called /etc/init.d/zerotier-one with the following contents:
#! /bin/sh
# /etc/init.d/zerotier-one
BEGIN INIT INFO
Provides:          zerotier-one
Required-Start:    $network
Required-Stop:
Default-Start:     2 3 4 5
Default-Stop:      0 1 6
Short-Description: ZeroTier One VPN
Description:       ZeroTier One service launcher
END INIT INFO
case "$1" in

start)

echo "Starting ZeroTier One Service"

/usr/local/zerotier/zerotier-one &

;;

stop)

echo "Stopping ZeroTier One Service"

killall zerotier-one

;;

*)

echo "Usage: /etc/init.d/zerotier-one {start|stop}"

exit 1

;;

esac
exit 0
Additionally, the script must be made executable:
chmod +x /etc/init.d/zerotier-one
Once this is done, you can run update-rc.d zerotier-one defaults to run the script and boot and shutdown. You can also run service zerotier-one start and service zerotier-one stop to start and stop the service.
Configuring ZeroTier
Now that you have compiled the ZeroTier service for your ReadyNAS system, you can run the CLI to join your NAS to your network. Documentation for the CLI is provided on ZeroTier's GitHub Wiki, but the command to join a network is simple:
/usr/local/zerotier/zerotier-cli join <network ID>
Simply replace "
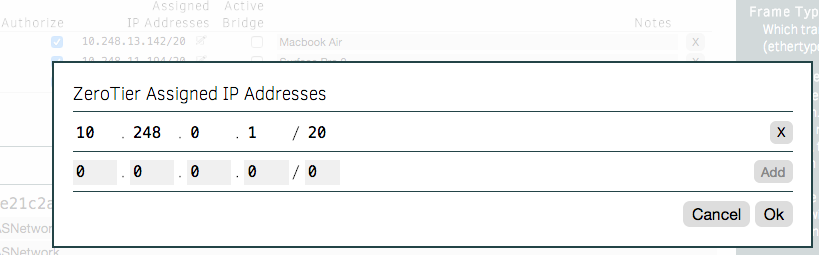
You can also set a custom IP address for your NAS by clicking the edit icon in the "Assigned Addresses" column of the client list. Enter an IP address, and after a minute your ReadyNAS should be usable at your custom address.
Now you can visit the IP address in your web browser to view the admin console of your ReadyNAS device, or connect to AFP/SMB/NFS. This same IP address will work regardless of whether you're on the same physical network (or a different one) as your NAS. Additionally, because ZeroTier is a mesh VPN, your traffic will also take the shortest route possible, which is often a direct connection from your computer to your NAS. If you are behind a strict firewall, ZeroTier's supernodes will route your traffic between your devices for you, though this is unlikely to happen given the number of firewall-punching techniques embedded in the VPN software.
So far, the ARM based device has proved plenty capable and for a significantly lower price than most other NAS systems would come out to2. Combined with ZeroTier and CrashPlan to backup the critical data, the ReadyNAS 104 is a great little home/small business-class NAS that allows you to access your files from anywhere.
- The software is open source, but lacks documentation and is not trivial to setup. Additionally, you may also be required to run "supernodes", which is simply a client that is used to relay traffic between two devices on a strictly firewalled network. The software for a "supernode" is the same as any other client, but usually it is run on a VPS or other server. ↩
- Amazon had a sale of the ReadyNAS 104 for ~$200, which is a good $60 off of what it is now. ↩