#web-performance
Since I originally moved my blog to the Jekyll platform, I've been looking for several ways to push the performance of my website further.
Over the last couple of months, I've been exploring several content distribution networks for my new web course Extreme Website Performance, such as CloudFlare and Amazon's CloudFront, as well as forgoing a CDN altogether and focusing on reducing the number of network requests used (and therefore taking the bottleneck away from the distribution servers).
Currently, if you take a look at the source code of my website, you'll see something peculiar-- a severe lack of indentation and several, inlined Base 64 and WebP images. For example, here's a snippet of my website's source HTML from the home page.
<div class="photo">
<img src="data:image/webp;base64,UklGRg...AAA="/>
<h2><a href="/blog/multiple-gradients-css">Multiple Gradients in CSS</a></h2>
<span>20 May 2013</span>
</div>
Obviously, it would be counter productive for me to design my HTML pages without any indentation-- it would be a nightmare to manage opening and closing brackets. Rather, I've enabled mod_pagespeed by Google on my server, which does this minification for me automatically.
Essentially, mod_pagespeed is an Apache module by Google (also available in an nginx flavor under the name ngx_pagspeed) that optimizes your web pages, text assets, and images. It'll combine and minify your Javascript and CSS as well as recompress your images-- without your intervention and without adding a new build step in your deployment system. It can be considered a JIT compilation layer for your website.
Installing mod_pagespeed
Installing mod_pagspeed with the default parameters takes a little less than a minute. You can view the instructions to install the optimization system for your respective application server on the Google website. As mentioned previously, mod_pagespeed is available for the Apache and nginx servers.
Configuration
Out of the box, mod_pagespeed is ready to go and is immediately enabled for all of your HTTP websites, but a little bit of configuration you can do. You can find all of the configuration options and filters in the documentation.
If you'd like to disable mod_pagespeed globally and only enable it per-virtual-host, you can do so by editing the pagespeed.conf file. The location of this file depends on your server and operating system (the combinations of OS/Server and respective file locations are available in the documentation), but for Ubuntu and Debian servers with Apache, the file will usually be located in /etc/apache2/mods-available/.
In the pagespeed.conf file, you can specify global filters or enable/disable the optimization system entirely. To disable mod_pagespeed, simply add a new line in the configuration file:
ModPagespeed off
This single line will disable mod_pagespeed globally, but still allow you to enable it per-site.
To do so, edit your website's virtual host configuration (located in /etc/apache2/sites-available for Apache/Ubuntu/Debian users) and add a new line, similar to what you did previously to globally disable mod_pagespeed--
ModPagespeed on
Other options include the ModPagespeedEnableFilters configuration line item, which allows you to enable additional optimization filters, such as the GIF/PNG to WebP image converter.
My Configuration
Personally, I have three other filters enabled in addition to the defaults--
convert_jpeg_to_webpcollapse_whitespaceconvert_to_webp_lossless
The first and last filters in the list above automatically convert JPG, GIF, and PNG images to WebP when applicable and a supported browser is being used by the visitor. If you're using a supported browser, such as Google Chrome, you can see this for yourself by right clicking any image and viewing the source of the web page or copying the URL of the image.
The collapse_whitespace filter, while slightly more "dangerous" due to the fact that it significantly modifies the webpage itself with the potential to improperly remove whitespace, also reduces the file size of the HTML slightly.
Previously, we went over how the new WebP image format compared to the traditional JPG. One neat thing about WebP is that, unlike JPG or PNG, WebP has the ability to use either lossy or lossless compression, with or without transparency. While JPG is traditionally used to display photos, which have a high level of detail and are generally more complex and can suffer from a little bit of detail loss as a tradeoff for compression, WebP can also be used like a PNG, which is often used for web graphics with transparency or subtle patterns.
Like the previous test, we'll use a baseline image in a "traditional" format to compare the WebP file with. Because WebP is capable of storing alpha transparency (a key feature of PNG and one of the primary reasons to use the format) in a lossy image, we'll use a couple of images-- the baseline PNG, a losslessly compressed WebP image, a lossy (with alpha) image at a quality of 100, and a lossy image (with alpha) at a quality of 80. All of the previously listed formats are capable of alpha transparency. In these tests, the alpha_q quality was set to the default of 100.
Once again, we'll use Google's precompiled WebP encoder cwebp version 0.3.0, which is available for a variety of platforms on the official WebP download page. The command to output a lossless image from a source PNG file is cwebp -lossless [input] -o [output]. As with the JPG vs. WebP comparison, the command used to generate a lossy WebP file is cwebp -q [quality] [input] -o [output].
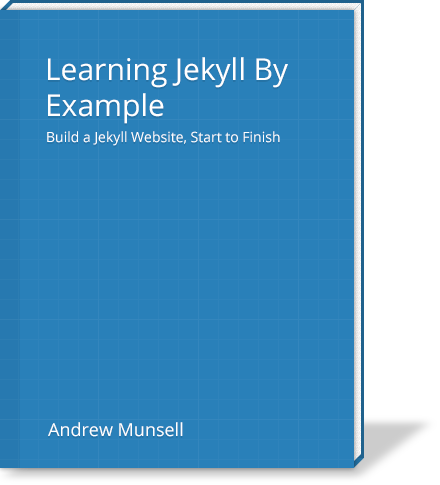
Book Cover Illustration
If you've seen my new home page design, you might have noticed the graphic of a book cover for "Learning Jekyll By Example." This graphic has relatively low complexity compared to a photograph, and also has transparency. Due to these two factors, I chose to use PNG as the image format to embed the graphic in my website. Now, let's see how WebP compares to PNG.
The original PNG image is 30.2 KB, versus the lossless WebP at 8.9 KB. You can download either of the source images with the links below, though they will look the same due to the lossless compression. You will need a WebP compatible image viewer, such as Google Chrome or Opera, to view the WebP file.
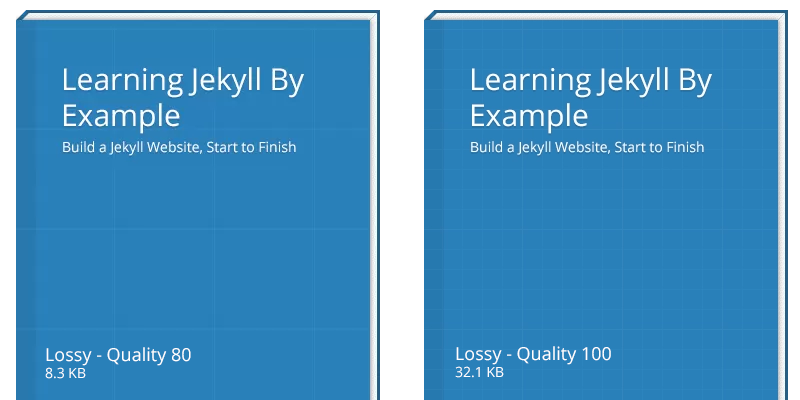
On the other hand, the lossy versions of the book cover have some quality loss depending on the quality setting used. Below I've included a screenshot of the book cover image at different quality settings for those that do not have a WebP capable browser, though you can also download the source files for your own comparison.
Note, you can click on any of the images in this post to view them full size and view them without your browser resizing the images.
As you can see, the lossy compressed WebP file has some noticeable detail loss. The biggest issue you can see is with the grid lines on the book cover, which have disappeared in some areas due to the compression. This also occurs at a quality setting of 90 (note: not shown). However, the lossy image at quality 100 looks fine with little to no quality loss compared to the lossless versions.
It should be noted that, with this image, the lossless image is actually smaller than the lossy image at quality 100, and comparable in file size to the lossy image at quality 80, though with no detail loss. With this image, it's clear that the lossless WebP encoder wins.
- Book cover - Baseline PNG (30.2 KB)
- Book cover - Lossless WebP (8.9 KB)
- Book cover - Lossy WebP, quality 100 (32.1 KB)
- Book cover - Lossy WebP, quality 80 (8.3 KB)
Ticket Graphic
Next, we'll test a ticket graphic by Premium Pixels. While the image does not have any transparency, the subtle pattern detail in the background and ticket graphics make it a prime candidate for PNG. JPG, or any other lossy format, will potentially reduce or eliminate this texture at higher compression settings.
The original PSD source file was saved as a PNG to serve as a baseline. The baseline PNG has the Photoshop setting "smallest/slow" enabled for compression, and no interlacing.

The original PNG comes in at a hefty 243 KB-- not ideal for mobile connections or visitors with lower bandwidth connections. In contrast, the lossless WebP image file is 183 KB in size. While it's a little bit smaller, we can still do better in terms of compression as the file is a little large.
The lossy images compared below come in at a smaller size than the lossless equivalent, unlike the previous test with the book cover graphic in which the lossless graphic was actually smaller than any of the lossy files. For comparison, you can see the differences between a quality setting of 100 and 80 below.
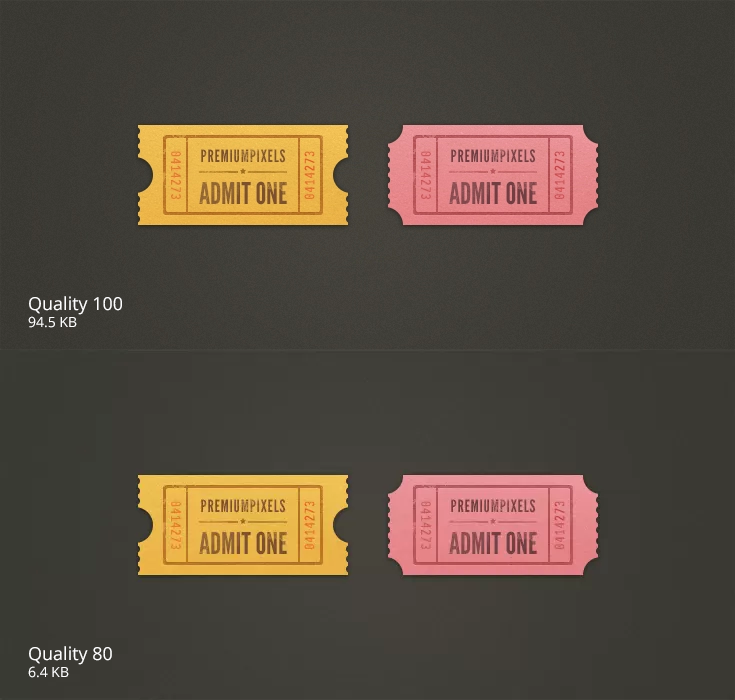
As you can see, the lossy compression resulted in artifacts at a quality of 80. In fact, if you compare the baseline (or even the lossy-100 WebP) file to the quality-80 WebP, you will notice significant reduction in texture detail-- especially in the background, which has effectively become a blocky radial gradient. The tickets themselves also show a reduction in texture in the lossy compressed WebP with a quality of 80. However, the lossy compressed WebP file at a quality of 80 has a file size that is a mere 2.6% of the original baseline PNG image-- impressive for the amount of detail retained in the compressed file.
- Tickets - Baseline PNG (243 KB)
- Tickets - Lossless WebP (183 KB)
- Tickets - Lossy WebP, quality 100 (94.5 KB)
- Tickets - Lossy WebP, quality 80 (6.4 KB)
As a bonus, let's take a look at how JPG fares in this test--

Coming in at 8.3 KB, the above JPG at quality 3 looks downright terrible compared to the WebP at a quality of 80 (and a file size of 6.5 KB). In addition, these file sizes were only achieved after being run through ImageOptim.
If you want to learn more about (the fantastic, and free) ImageOptim or other image optimization tools, why not check out my upcoming web course Extreme Website Performance"?
The WebP, even though it is smaller in file size than the JPG, has significantly more detail around the edges of the ticket and the gradient in the background is much smoother. While neither the WebP quality-80 or JPG quality-3 images are high enough detail to view the subtle textures in the image, WebP clearly wins for quality and file size against JPG in this test.
Other files, for comparison, are included below:
- Tickets - Lossy JPG, quality 3 (8.3 KB)
- Tickets - Lossy JPG, quality 1 (5.3 KB)
- Tickets - Lossy JPG, quality 0 (4.9 KB)
Conclusion
Depending on the image, it may or may not be beneficial to use the lossy WebP format. Images that require transparency may need to experiment with different lossy quality settings, or even the quality of the alpha channel (by default, in all of the images above, the alpha quality was 100). However, in the ticket example, it's clear that the lossy WebP compression can reduce the file size of web graphics significantly without any discernible detail loss.
There are several kinds of file formats for images on the web. Primarily, web developers use JPG and PNG image files, depending on the content of the image itself. However, Google has made a push recently to use a new format-- called WebP-- that is supposedly more efficient than JPG, yet still has the ability to have transparency. In other words, WebP is the best of both JPG and PNG file formats-- but does it really reduce image file sizes?
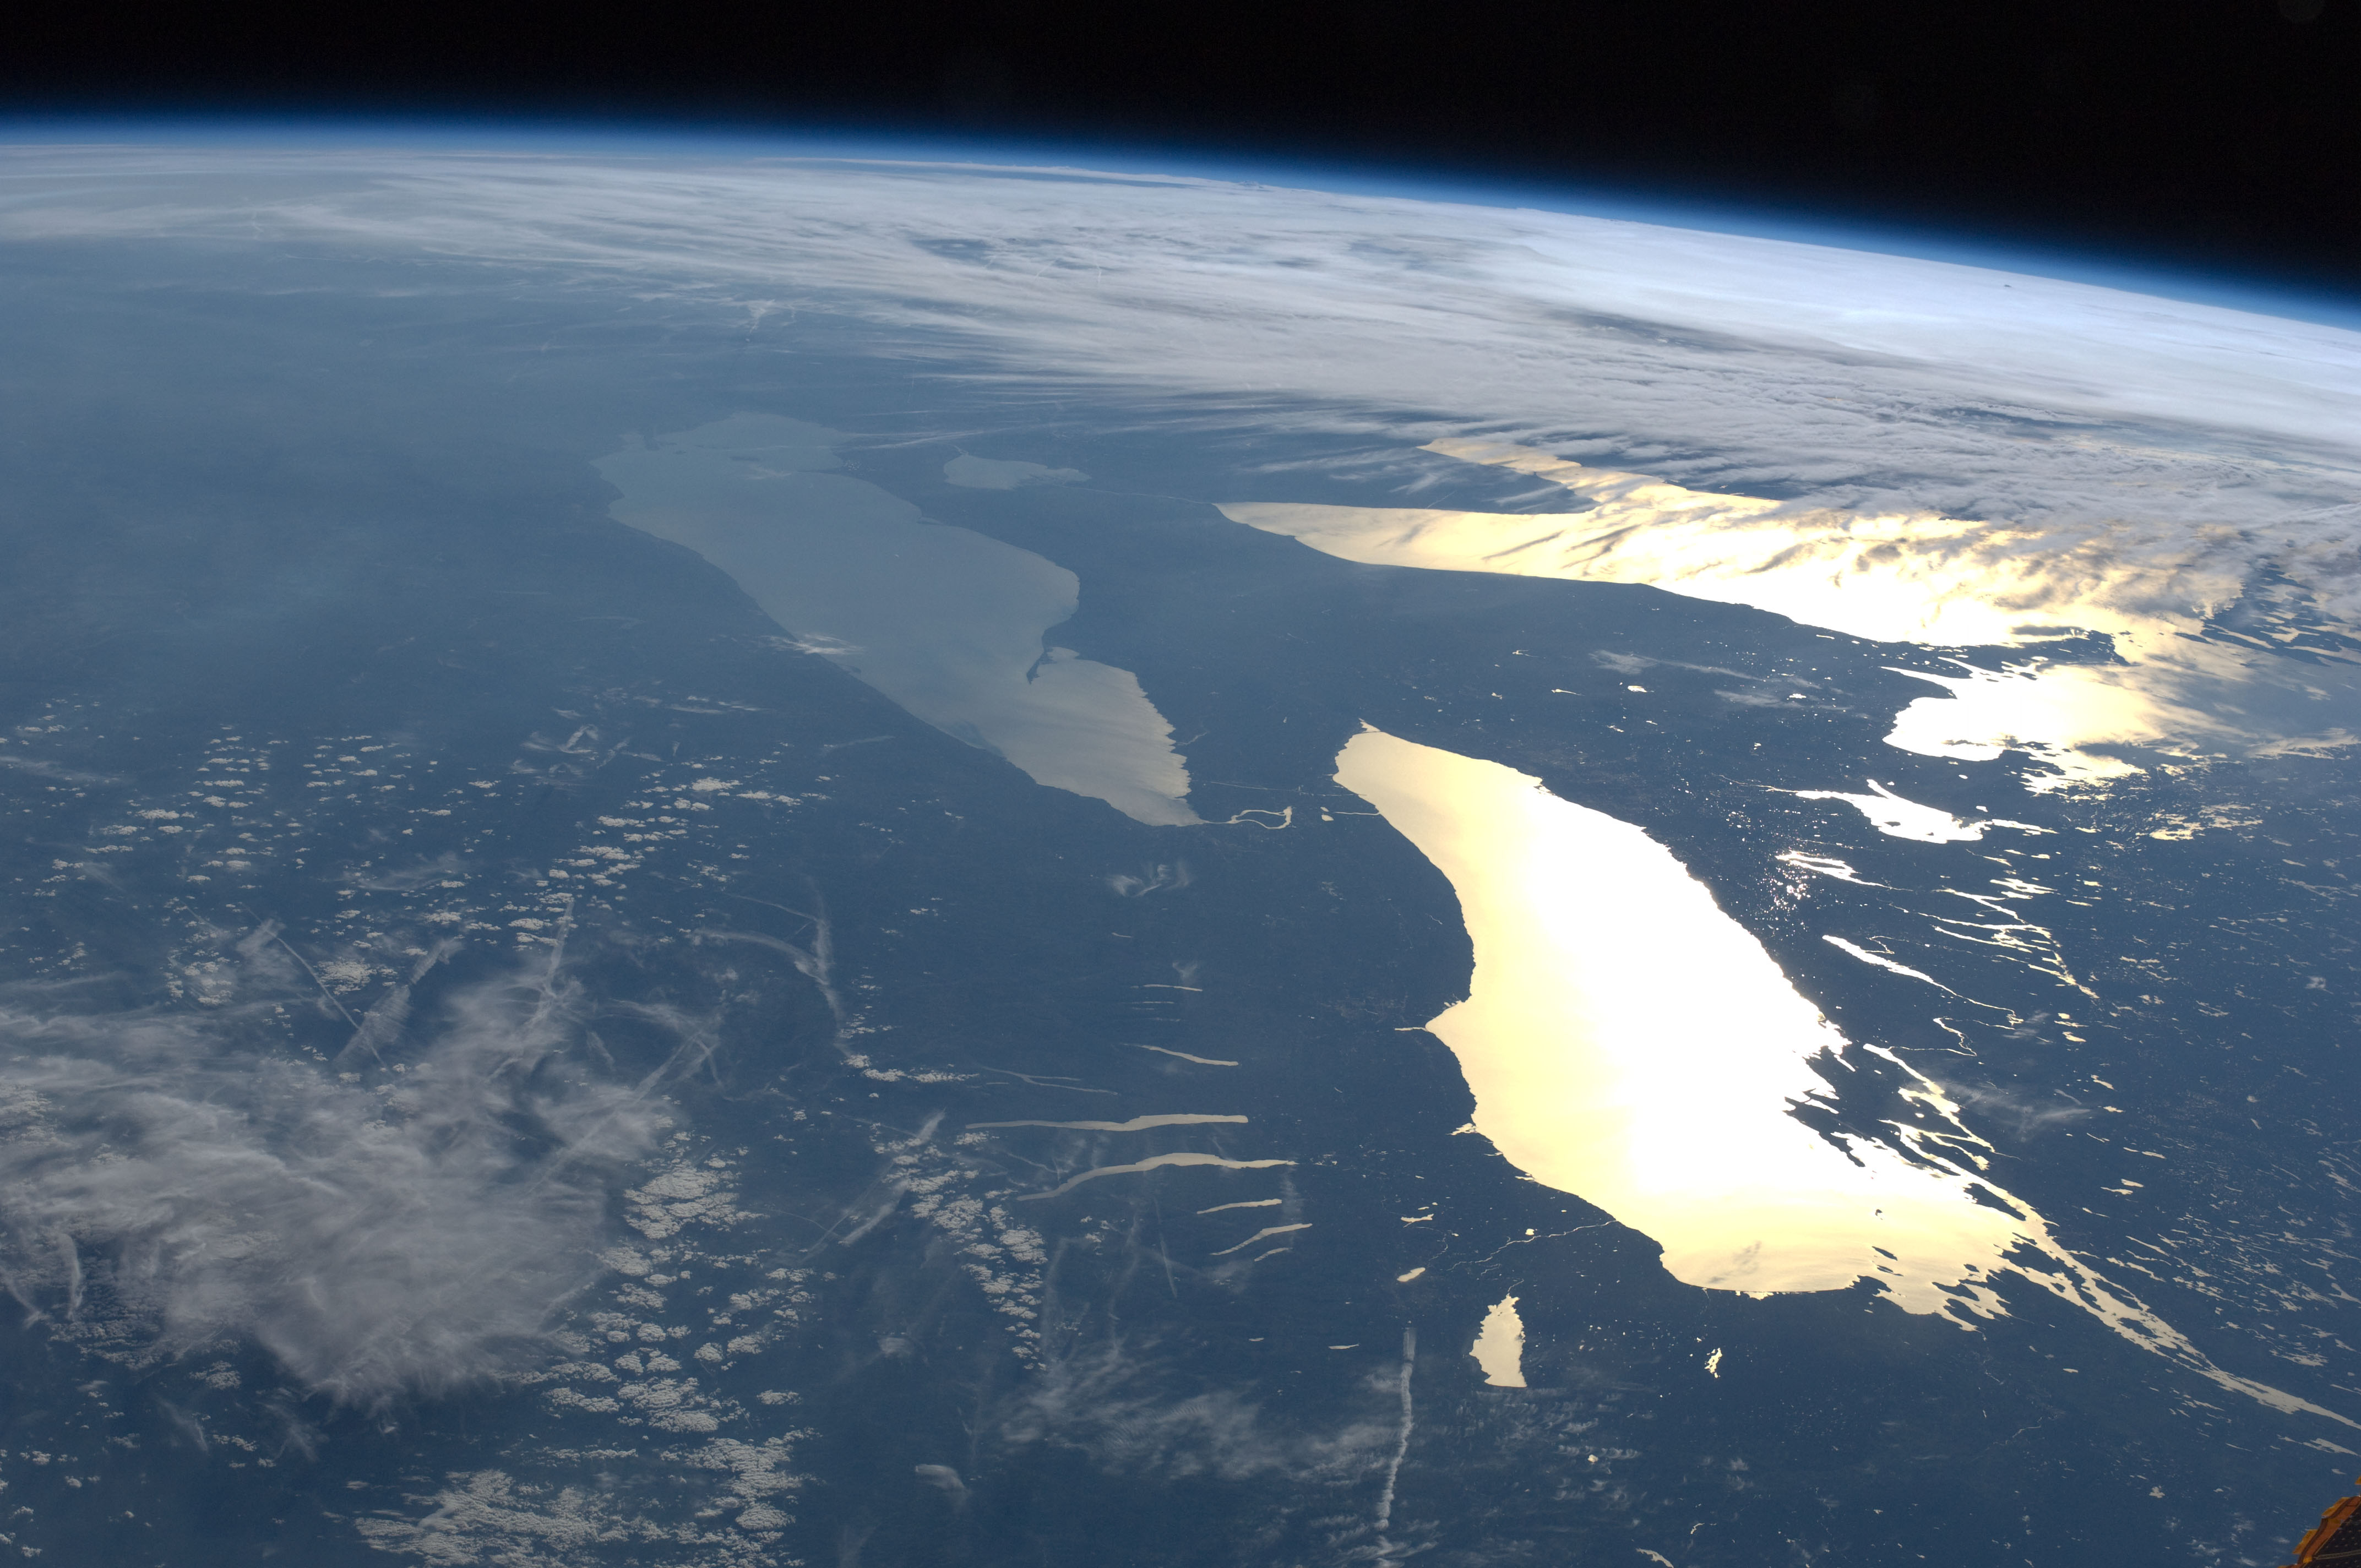
JPG vs. WebP
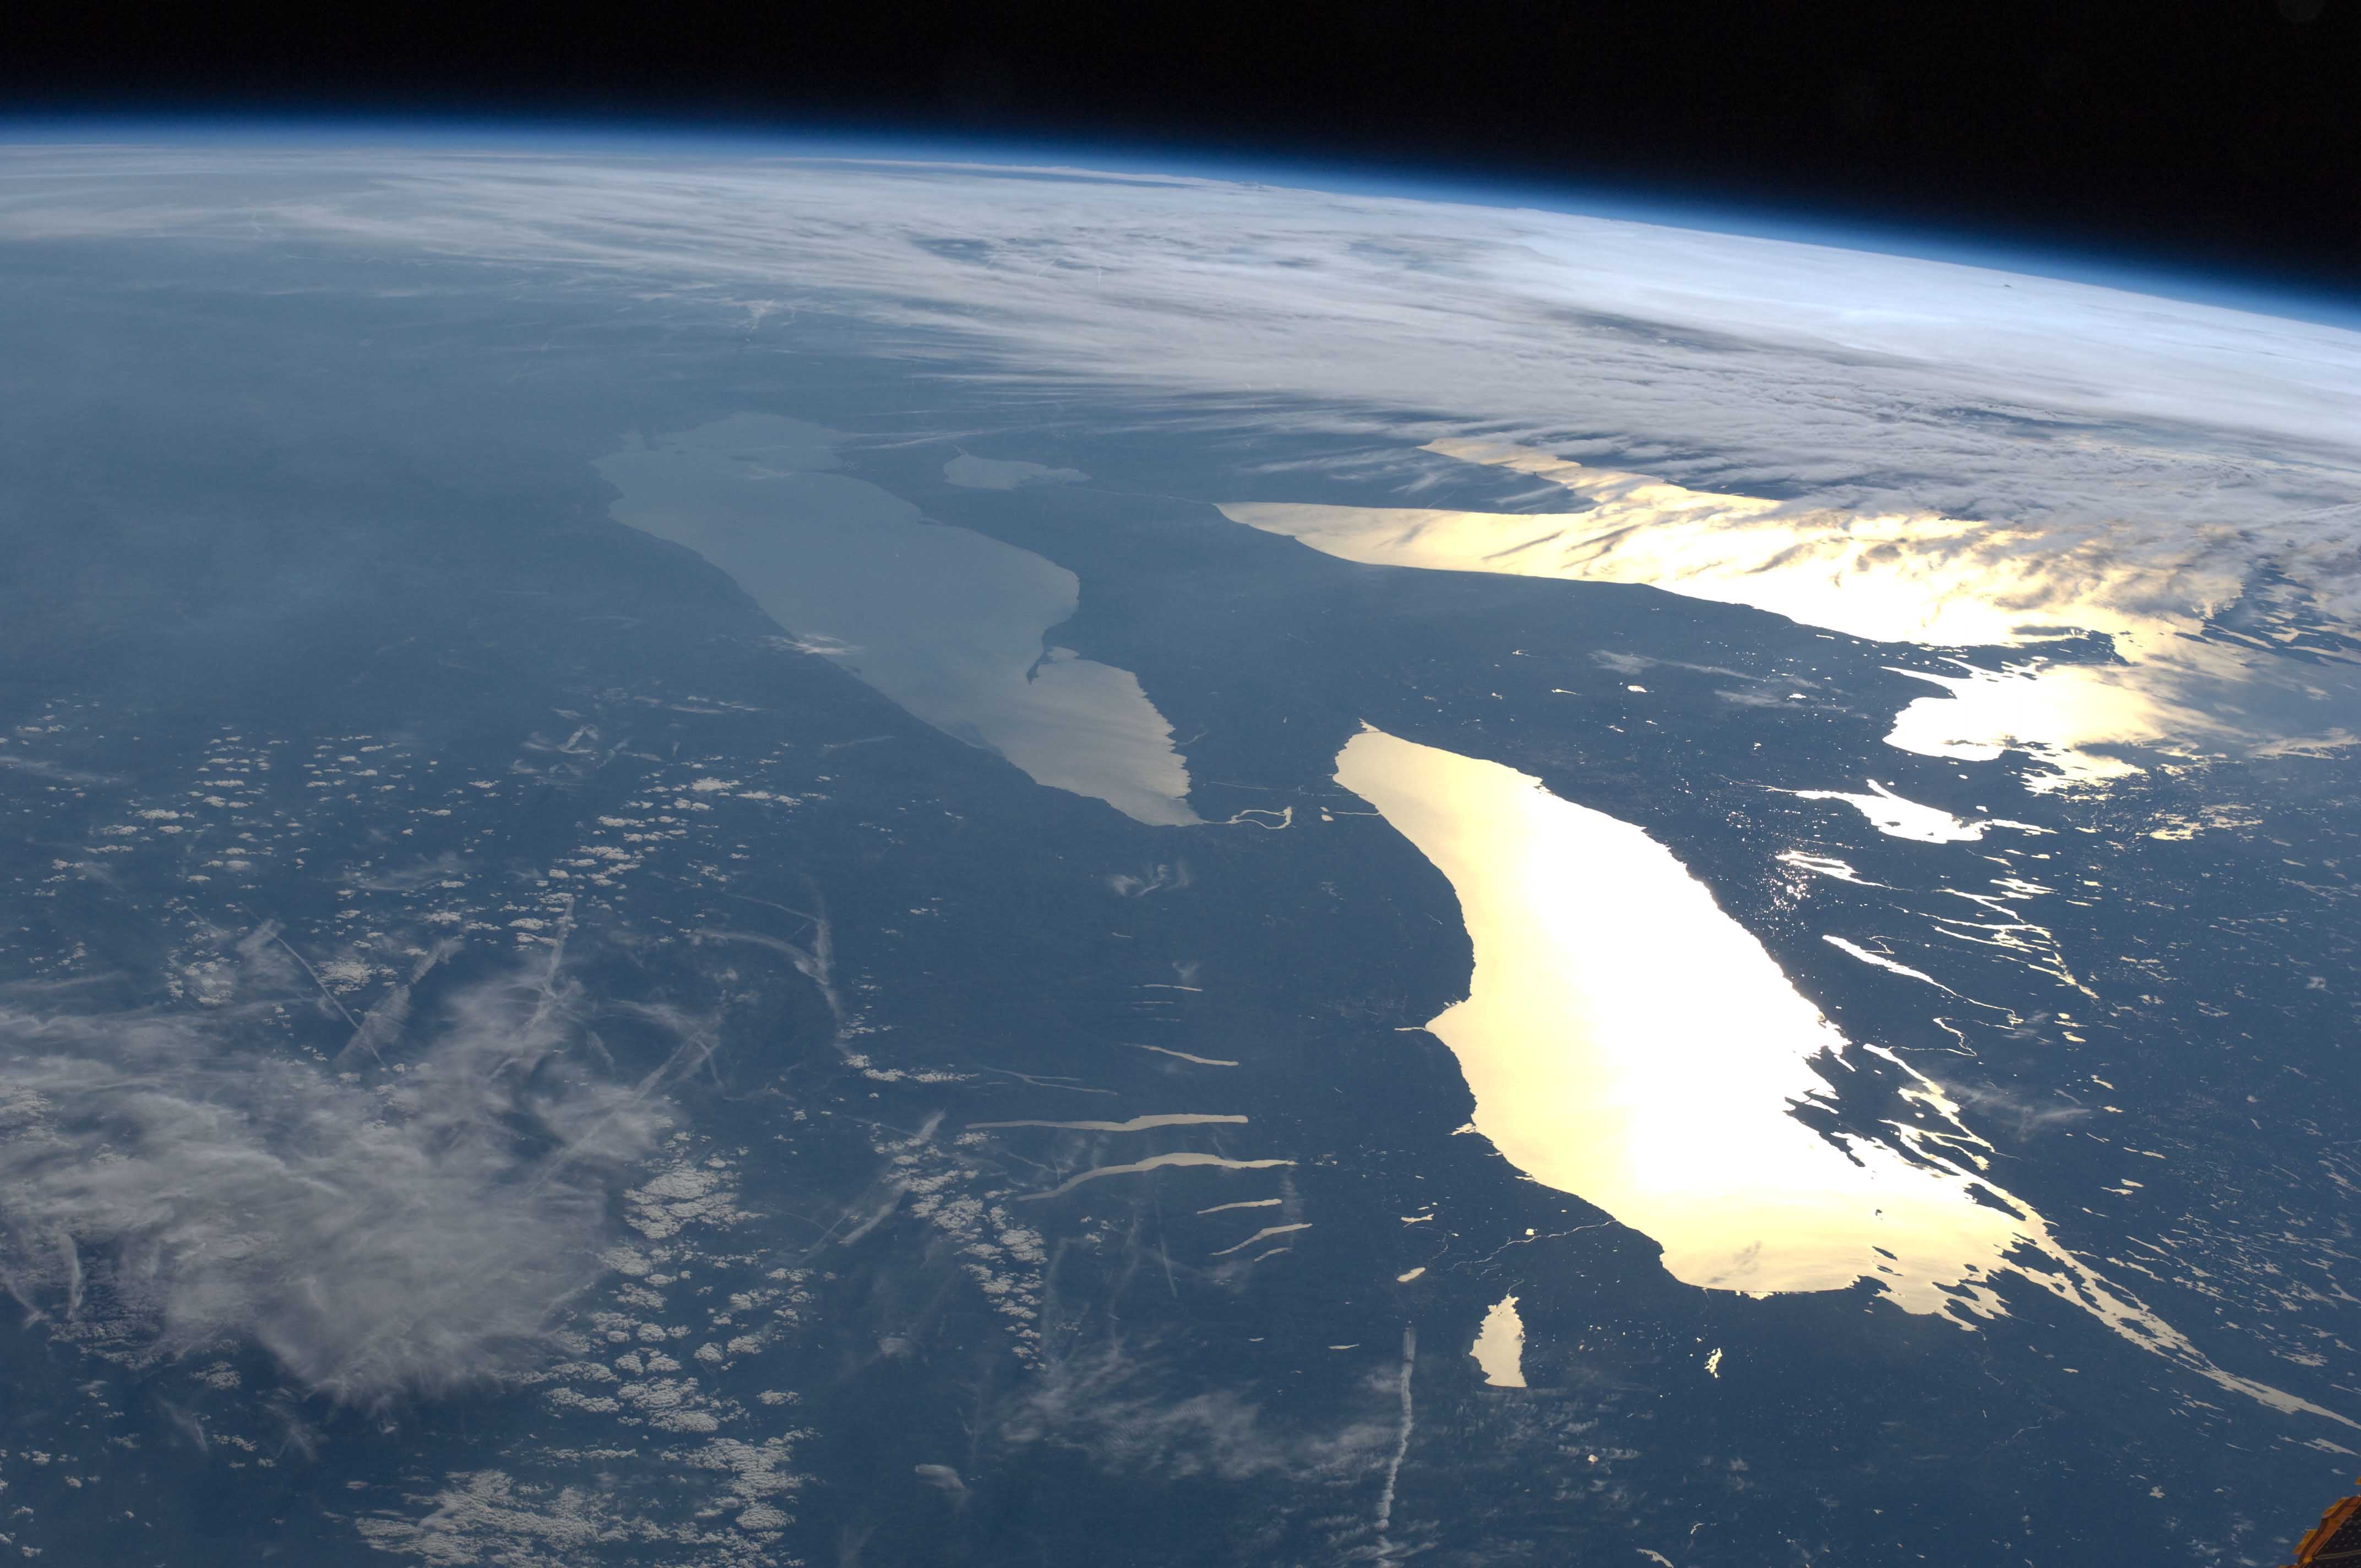
To compare the two file formats, we'll be using a baseline image taken by NASA's Marshall Space Flight Center of the Earth. The original file is 4288x2848 and in the JPG file format. For each of the following benchmarks, the image was saved in Photoshop as a JPG with variable quality settings. No further modifications have been made to the JPG files, and they have not been optimized further with any external tools. The WebP files were converted from the original JPG using the cwebp tool (version 0.3.0) on Mac OS X 10.8.
Note that due to resaving the file as a JPG in Photoshop, there is a "double penalty" for quality-- quality is reduced once when the photo was originally taken and compressed to JPG, and a second time when resaving the file with a different quality setting or when converted to WebP.
Finally, the comparison images posted within the blog post are shown as a losslessly compressed PNG to aid those users without a WebP capable browser. Additionally, depending on which browser you're using now, my server may automatically show you a WebP version of the inlined images, though this will also be a lossless image. To view the original JPG and WebP files, you can click on the links provided. You will need to drag the files into a WebP capable browser or image viewer, such as Google Chrome, to see the WebP images.
Baseline
The baseline image is that of the Earth taken from the International Space Station. You can view the original image (1.1 MB JPG) here, or see a resized version below to get a sense of what the image is of.

On a side note, if you're curious why the above preview image is 1440x956 and extremely low quality (yet, it doesn't look that way when you're looking at it in the post, only when viewed full size), it's a technique to make the image sharp for retina devices and still have a reasonably sized photo megabyte-wise. Why not take a look at my new web course on website performance for more infomation on how and why?
JPG at Varying Quality Levels - Full Size JPG
As you may know, JPG is a lossy image format. Essentially, this means to achieve smaller file sizes, image editing apps will compromise by adding artifacts. These varying quality levels result in more or less artifacting, which can be seen below. The preview image below has been cropped for a 1:1 pixel ratio on a normal, non-Retina screen. You can also click the image to open it in a new tab to ensure your browser is not scaling it.
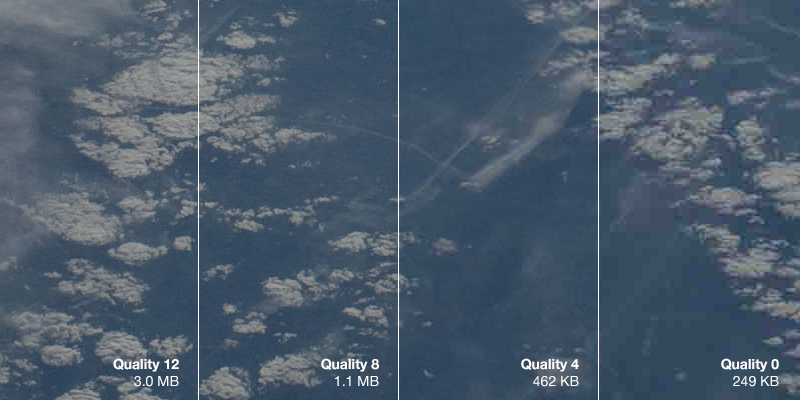
- Full Size JPG at Quality 12
- Full Size JPG at Quality 8
- Full Size JPG at Quality 4
- Full Size JPG at Quality 0
As you can see, the JPG with a quality setting of 0 is muddy and there are visible blocks of artifacts in the image. There is a significant loss of detail in the clouds to the point where they become hard to identify.
Remember-- the file sizes illustrated above are extremely large for the quality setting because the image is 4288x2848 pixels. Smaller graphics and photos, such as those you may embed in your website, will also be smaller in file size. However, the image file size savings still apply.
WebP at Varying Quality Levels
Now, we'll run the original, full size image through the WebP converter. We will also use the command, cwebp -q X original.jpg -o quality-X.webp, replacing the "X" with a quality level between 0 and 100.
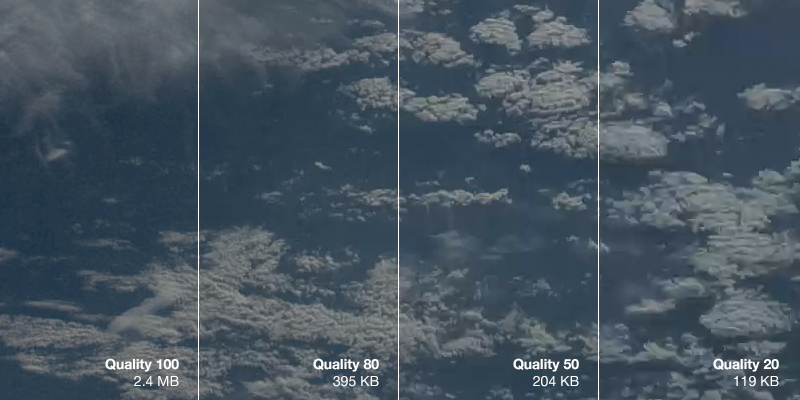
The first thing you'll notice is that the WebP images are significantly smaller than the JPG images-- at any comparable quality level. When comparing the images visually (e.g. you can argue that JPG quality 4 looks most similar to WebP quality 50), you can see that the WebP image can be approximately half the size at the same level of visual fidelity.
WebP is an exciting new tool for web developers. While not supported in the majority of browsers, WebP images can have similar quality to JPG photos at a much reduced file size. This is not only important because it reduces the loading time of your web page, but mobile and bandwidth capped users will not be forced to download extremely large images when visiting your web page. By using a server side optimization tool, such as mod_pagespeed, you can serve WebP images to your visitors capable of viewing them, and delivering older formats (such as JPG and PNG) to other browsers.
Next time, we'll look at losslessly compressed WebP images to see how the file sizes compare to PNG images.
Kraken is a web service designed to perform a similar function to desktop based applications such as ImageOptim. For as little as $7 a month (for half-a-gigabyte of images processed a month), you can have Kraken.io process your images and compress them. Alternatively, you can use their free web service by uploading files individually. The service works significantly faster than ImageOptim because of the powerful servers that they use to crunch your images.
But, how does it compare to the desktop equivalent?
The quick answer is, "it depends." Minimally, Kraken's optimization is nearly as good as ImageOptim, or equal to it. For example, Kraken configured with "Lossless" settings saved an average of 34% off of the original file size off of several PNG images, whereas ImageOptim saved 35.1%. The difference is relatively minor.
In the JPG arena, Kraken initially appears to perform significantly better than ImageOptim, saving 47% of the original file size versus ImageOptim's 34%. However, Kraken obtains these savings by reducing the image quality setting of the JPG. Conversely, ImageOptim has a maximum quality setting, but will not reduce the quality beyond this user set number. Instead, ImageOptim performs optimizations with the file format itself to achieve a lossless compression. This is similar in behavior to Kraken's ability to losslessly compress JPG files.
For example, the following two images were compressed by Kraken's web service-- one losslessly, one with lossy compression. As you can see, Kraken actually does a very good job with its compression in this case and does not introduce any significant artifacts into the image, despite the 73% savings over the original image.
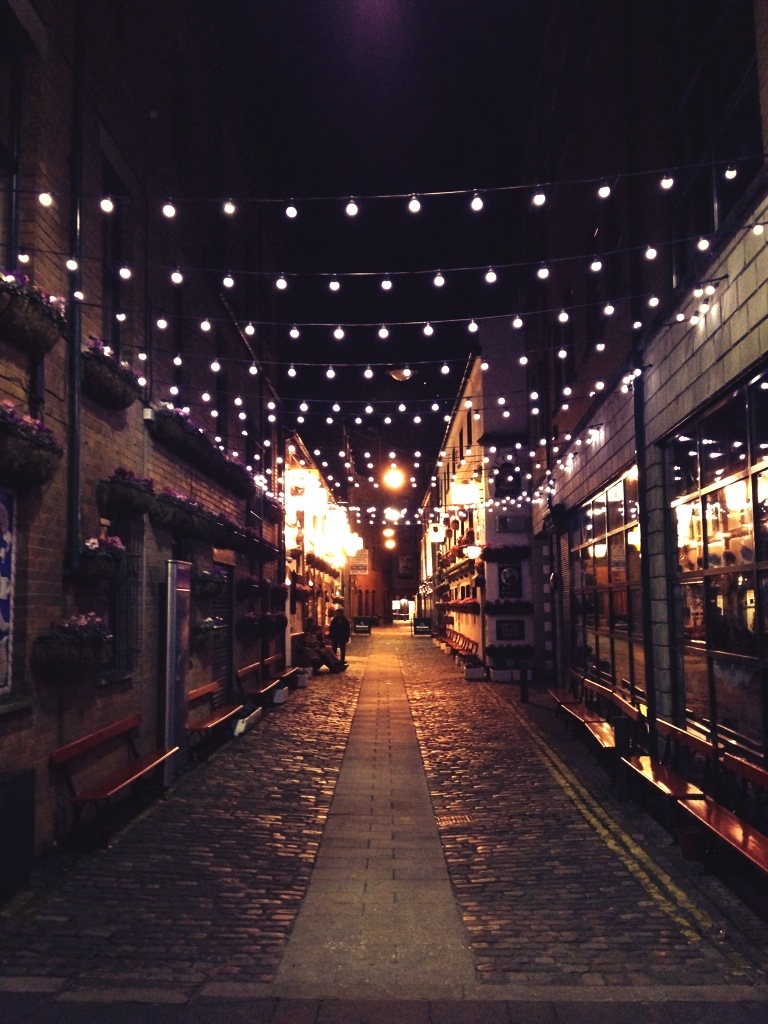 |
 |
| 380kb ~21% Savings |
120kb ~74% Savings |
To the casual observer, there is virtually no difference between the two images above. The most noticeable area where artifacts are introduced is around the lights hanging across the road, though it is a relatively minor side effect to shaving off nearly 3/4 of the original file size. You can see this yourself by clicking on the images above and opening the full sized images in new browser tabs, zooming in, and then switching back and forth between tabs.
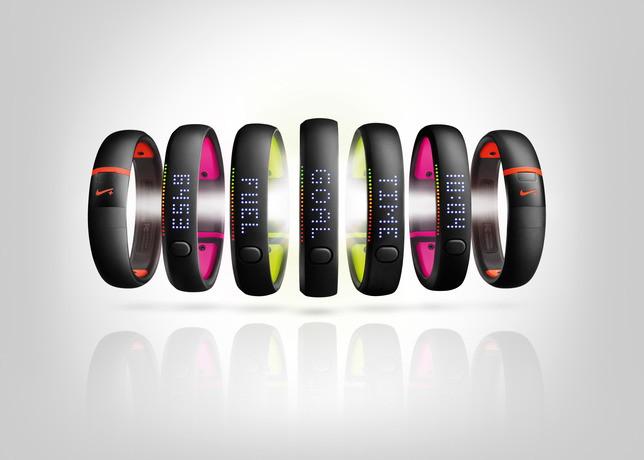
However, this isn't necessarily true for all images. For example, the following Nike Fuelband+ SE press images have been run through Kraken-- both with lossless and lossy compression.
 |
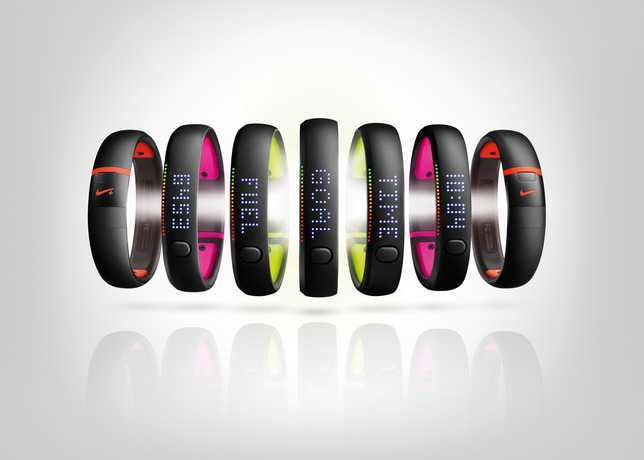 |
| 47kb ~4% Savings |
16kb ~67% Savings |
The lossy compressed image has a significant number of artifacts around the face of the band, resulting in an image that does not look optimal. Interestingly, the lossless compressed image from Kraken is the same size as the image produced by ImageOptim-- likely because Kraken's using the same optimization backend as ImageOptim, with some additional fine tuning.
A point to note is that Kraken does not accept images above 1mb in size for the free web interface, or above 8mb for any of their paid plans. This may be an issue when you're attempting to compress photographs straight off of camera, or large PNG infographics and such. You will have to shrink the files by hand locally prior to using the Kraken web service. In contrast, desktop based apps such as ImageOptim have no limitation on the file size in practice.
Another primary issue with Kraken is the lack of ability to change quality settings. This is especially a problem with lossy compression, where the quality of the image is degraded. It'd be ideal to have a slider to determine what quality to file size ratio is desired.
Kraken's paid plans have several additional features over the free web interface, such as the ability to optimize images by pasting a URL, as well as scan an entire website and optimize all images. Additionally, Pro users have the ability to save images in their Kraken Cloud Storage account.
In conclusion, Kraken is a great web service to replace existing desktop apps such as ImageOptim. Pro users also have the neat ability to use the API, so that images can be optimized on a website's deployment. As long as you're happy with the default settings Kraken provides, however, it's a great service and will help you maintain high performance on your own website.