How to Install GitLab Locally in a Virtual Machine
GitLab is an open source clone of the popular GitHub service. In a lot of ways, it is similar to GitHub's Enterprise solution or Atlassin Stash-- it allows you to host Git repositories and a management interface yourself, potentially within your company's firewall.
While I do have a server that I use for production apps, I do not want to also place my code repositories and CI server on the same box. Renting another server will cost ~$20 a month extra on Amazon EC2 (with a Micro instance) or about the same amount on providers like Linode. For small developers, this additional cost may not be an option. Instead, you can have your own private GitLab installation running locally on your server or network, or even on your local machine in a VM, which I will show you how to do today.
Intro to GitLab
For small companies, individual developers, or even large corporations that want to maintain control of their own code, GitLab may be an interesting alternative to other software. Unlike GitHub or BitBucket, you host the GitLab installation yourself on servers you control.
It is currently on version 4.0 and available for free under the MIT license.
Setting Up GitLab
Normally, you'd set up GitLab on a dedicated (or virtual) server somewhere that is accessible from the internet or your company's intranet. In my case, only I need access to it, so I will be doing the following:
- Set up an Ubuntu 12.04 Server in Parallels
- Configure Ubuntu to use a static IP address
- Install GitLab using the provided script
- Edit the
/etc/hostsfile of my Mac so I can access the installation fromgitlab.devin my browser. - Configure the installation and add a new user
This way, I can point my browser to http://gitlab.dev and access the GitLab installation if the virtual machine is running in Parallels. I can start up and shut down the VM whenever I need, and it incurs no additional cost.
Setting Up the Virtual Machine
Because I've already bought a Parallels 7 license for my Mac, I used that. You can also use VMWare Fusion or Virtual Box (which is free) to achieve the same effect.
We will be using Ubuntu 12.04 Server LTS 64 bit, which you can download for free from the official website.
Configure a new virtual machine in any of the above applications and allocate a virtual hard drive (I used an expanding hard drive with a maximum capacity of 10 GB) and some RAM. You should allocate a minimum of 1 GB of RAM if you're planning on installing GitLab and the GitLab CI server. Personally, I allocated 1.5 GB of RAM since my Macbook Air is configured with 8 GB total and I have plenty of free RAM to spare. Video memory is not important since we will not be using a graphical interface in Ubuntu.
Attach the Ubuntu 12.04 Server LTS ISO image and follow the installation prompts, creating a user and configuring language, keyboard layout, and time.
Once the installation is completed, you are ready to configure a static IP address for the GitLab server.
Configure Ubuntu's Static IP Address
To configure a static IP address, you can use a similar process I described in my tutorial for Setting Up the Raspberry Pi as a Headless Device.
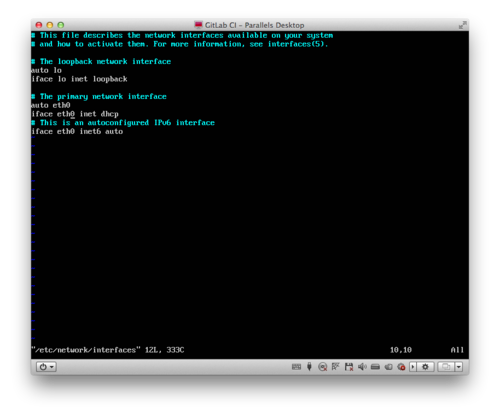
Essentially, you want to edit the /etc/network/interfaces file. You can do this by typing sudo vi /etc/network/interfaces and editing the file to change the line that reads iface eth0 inet dhcp to the following, specifying an IP address, network mask, and gateway:
iface eth0 inet static
address [IP ADDRESS]
netmask [NETMASK IP ADDRESS]
gateway [GATEWAY IP ADDRESS]
Enter the correct values for your network configuration. If you do not know these values, you can type route -n into the command prompt and copy the appropriate values down for the gateway (it's the one that's listed as "UG" under the flags column) and ifconfig for the IP address and network mask. The IP address assigned by DHCP and shown in ifconfig can be used as the static values, but know that if your DHCP server reassigns the particular IP address you chose to set as your GitLab's static IP address, you'll get some errors. It's best to choose an IP address outside of the range of addresses your DHCP server uses.
Installing GitLab
Conveniently, a script has been provided to install GitLab automatically. As indicated in the installation guide, you simply have to run the following command:
curl https://raw.github.com/gitlabhq/gitlab-recipes/master/install/v4/ubuntu_server_1204.sh | sudo domain_var=gitlab.example.com sh
Note: It is important to replace "gitlab.example.com" with the IP address that you configured above.
After the script completes, reboot the server with sudo shutdown -r now.
Accessing GitLab
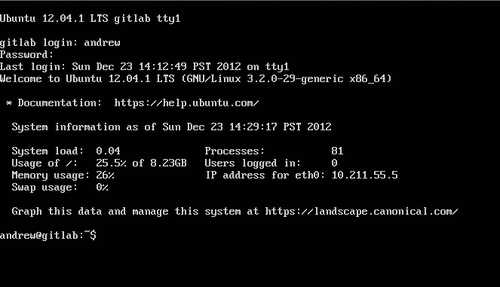
Once the server reboots and the login prompt reappears, you can try accessing the GitLab installation directly through the IP address you configured earlier. If you configured everything correctly, you should see the GitLab login screen.
If you see a Gateway Error (502), simply wait a minute or two for the server to finish booting.
If you'd like to be able to access your GitLab installation from a "domain name," like "gitlab.dev," "gitlab.local," or others, you can do so by editing your hosts file. Note we are doing this on your computer, not the virtual machine. On Mac OS X this file is located in /etc/hosts.
To edit this file, you'll need to be an administrator. You can edit the hosts file by going into your Terminal and typing sudo vi /etc/hosts and entering your password when prompted. Simply add a new line with the following:
[IP ADDRESS] gitlab.dev
Replace the "[IP ADDRESS]" with the address of your installation and "gitlab.dev" with the domain you'd like to access GitLab through.
After you've done this, go to the domain you've set above in your web browser (you may have to add "http://" when typing the address in if it's a non-standard TLD like ".dev" or ".local"). If it works, you'll see the login page.
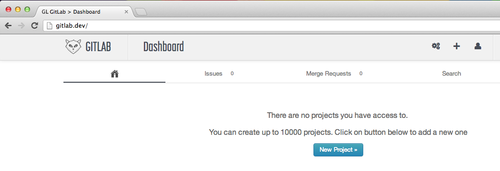
The default username and password for the GitLab installation are:
Username: [email protected]
Password: 5iveL!fe
You should immediately login with this username and password and either create a new administrator with your email address and password, then delete the old default user, or change the default administrator's password.
Downsides of Self Hosting GitLab Locally
Unlike GitHub, or even a version of GitLab hosted on a normal server, your local GitLab installation will only be accessible to you without further configuration. Some may say this defeats the point of having a version control system with powerful collaboration features like merge requests, but for individual developers who just want project and source code management, this will be a powerful solution.
On a related note, if you try and access the GitLab VM using the domain name you set in the hosts file from another virtual machine, it will not work. You must use the IP address directly or edit the hosts file of every VM and machine you wish to access GitLab from using a domain.
Also, the virtual machine must be running in order for you to access the GitLab installation. If you accidentally shut if off, then you'll have to start it up again. Running GitLab (and a Jenkins VM) on my Macbook Air takes up minimal processing power and there seems to be a very slight hit in battery life, but for laptop users it may be more useful to start and stop the VMs as needed.
Finally, services like GitHub invest a lot of money and talent into data backup. If you do not backup your data somewhere and the VM is corrupted or your computer is damaged, you will lose all repositories, issues, etc. Backup the virtual machine somewhere! Minimally, you should be backing up your code.